The Single List Page (SLP) allows for manual entry of your Item Details as well as populating those details from the Marketplace you may have selected in your Market Data Settings. The page is split into three sections as follows:
Item Details (blue)
Think of this section as your Catalog Data. Displayed here is the Image, Title, Author(s), Publisher (or Label for Audio), Publication Date (or Release Date for Audio), Media, Volume, and Edition. Keywords, the field at the bottom of this section, will not auto-populate. Manually enter text to this field for use in creating browse paths and categories on venues other than Amazon.

At the bottom of this section, you will also find an option to do a Title Search.
 To use this search function set up the Text Search Options in the last section of your Market Data Settings.
Listing Details (gray)
Enter the details specific to your item in this section. The fields that are viewed in this section are greatly dependent on what you have enabled on your Single List Settings page. By default, you will have a field for ISBN/ASIN/UPC, SKU, Condition, and Core Price. But, you can add a variety of other fields such as Condition Text, Venue Specific Price fields, or the 'Do Not List' section.

- Start by entering the ISBN, ASIN, or UPC code in the topmost field and click the "Populate Product Data". This will poll the Amazon.com database if you are Active there or the AOB Cache, populate the fields in your Item Details section, and pull Price data.
- Next, enter an SKU (unless you've set up Auto SKU in your Inventory Settings), Condition, Notes, Price, and any other fields you have selected to use.
- If you have set up any Clickey Notes in your Single List Page Settings, the IDs will appear just under the Notes label. Simply hover over the Note ID and the note will display in an info box. Click the Note ID and that note will be added to the Notes text block. Click another and it will add behind the first entry.
- Check the listing details entered to ensure that the item you are listing is exactly the same as the info that populated when you entered the ISBN/ASIN/UPC. Sometimes you will find that even though an ISBN is correct, the binding you have is different from the binding associated with that ISBN.
- If there is an Active Venue that you do not want an item to list to, select that Venue in the Do Not List section as shown:

- If the item being entered is FBA check this box:

- Select the Shipping Speeds you wish to offer and click the Create Listing button if you are ready to add the item to your inventory.

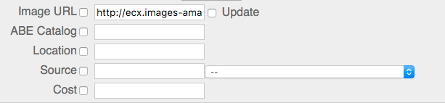
- Add an Image URL to your listing, set a Location, and enter your Source or Cost in the next block of fields:
Amazon Attributes
- Enter the Minimum, or Maximum Price settings for Amazon, match your items to your Amazon Shipping Templates and create a Category that will be sent to various other sites in this next block:
eBay Attributes
- To use the eBay Override Condition enter a Category ID and click the Populate Product ID button again to generate a drop-down menu containing any conditions available specific to your item.
- You can leave this at None if you wish to continue using the Condition as AoB has it in the Condition field of your listing page.
- Or, you can choose one of the available conditions and override the Condition field.

- Populating the Category ID will also produce Item Specifics fields on your listing page:

- Enter an eBay category number in the Primary Category field
- Click the populate button at the top of the page to generate a list of item attributes available for that category.
- Their fields will be displayed in one of two ways:
- A drop-down menu which will contain eBay's desired entries.
- Or a text-box with a drop-down menu; in the text-box, you can enter free-form values, or use the suggestions from eBay found in the drop-down menu.
- If you see a red asterisk (*) next to any of the fields eBay requires that attribute and your item will not successfully upload without a value. The other fields are for better matching, and searching, possibly only internal and informational, but are optional.
Business Policies
The business policies are populated from eBay based on what has been created by you directly on the site, in addition to any that eBay auto-created for you based on your previous listings. Set up default policies using the drop-down menu on your eBay Configuration page, or set them individually using the drop-down menu found on your Single Listing page in the eBay Attributes. Any items that have a policy selected on the listing page will override the defaults that may be set.
These values can also be set using a file that you upload to your account. Please see our list of Approved Headers for the headers to use and the values you'd supply.
Venue Specific Prices
You can select to send various prices to your venues using the Venue Specific Pricing.
- These are final prices, meaning the price entered into these fields will be the price sent to any specific venue regardless of any repricing you do using Soloist, our repricing software.
- Price raises, or decreases being done via the Listing Options in your Inventory Settings will use these prices instead of the Core Price.

Pricing (green)
When you click “Populate Product Data”, this block will show a sampling of current market prices. Prices are grouped in buckets comprised of items having the same Condition, Feedback rating, FBA/Merchant and whether it ships Domestically. Click on a price and that price, minus $.01, will be entered into the Core Price. Hover over a price to display a variety of pricing data:
-
- Listings Considered: will be followed by a variable number that represents the number of listings in the bucket mentioned above.
- Multiple at lowest: with either a True or False value.
- If True, the price displayed represents more than one listing.
- If False, then there's only one listing at the actual price displayed, regardless of how many are in the bucket.
-
- Shipping: will show the shipping amount.
- Total: will show you the lowest price in that specific bucket + shipping.
- Ships in: is the time it takes to get the package out for shipping.
- Ships Domestically: will have a value of true, false, or unknown, which will indicate whether the seller is from the US, or not.
- Feedback: displays a percentage (%) and a (parenthesized) number. The listings in the bucket all fall within the % range displayed and the (number) represents the feedback count of the seller whose price is displayed.
- Landed Price: Price + Shipping. This is the value that determines where it ‘lands’ on the list of offers on Amazon.
- Under the Sales Rank, you will see two low prices…
- Low Price: is the lowest when only the price is considered.
- Low Total: is the lowest when price and shipping are both considered.
-

- Price Highlighting...
- FBA price is Pink – whether, or not, you have enabled FBA here on AOB you will see Amazon's FBA items
- Seller price is Purple – highlighting will depend on if it happens to be the one displayed in the Buy Box on Amazon.
- Amazon's price is Green.
- Script Suggestions...
This block of information can be enabled in the Content section of your Single List Page Settings page -- 'Repricing Script Pricing' .. don't forget to save the page once selected.
When you are listing/editing inventory and have used the 'Populate Product Data' button to pull in the current prices for the item Script Suggestions will use your stored Repricing Script to suggest prices that you can click on to add to your Core Price field.
To see what information is being used to suggest the prices just hover your cursor over each Condition line and a popup text block will appear displaying details from the script output as seen in this snapshot...
Create Listing
When you are satisfied with your listing, click Create Listing and take note of the status message displayed in a blue box at the top of the page telling you the success of your entry.
If the item being entered is an FBA item the FNSKU label is linked in the status message.
Comments
From prospective user:
Does AoB have capability of using scanners to populate product fields to include ISBN, title, publisher etc.
Yes, and many sellers do use them with our service.
Most scanners include a return at the end of whatever they scan to submit the form. When you load our Single List Page the ISBN field is auto selected, so when you scan the barcode, it automatically fills in the ISBN field, submits it (which is the same as hitting our Populate Product ID button) and fills in the title/publisher/etc as it gets pulled from your chosen Marketplace.
Hi,
What about uploading books without ISBN? It seems it doesn't fill the SKU box when uploading one.
It depends on your Auto SKU Settings (found in Inventory Settings) You have to Enable Auto SKU to get them assigned, but you can also select to display your SKU when you click the Populate Product ID button. However, if you do not enter a product id, the SKU would be assigned as the second stage of item creation and you'd likely not see the SKU until you create the item. If you're uploading items in a file, it would basically work the same way and the SKU would be assigned during the item creation steps. Also, though, items without an ISBN/UPC/ASIN will require that you enter the Title of the item to successfully create the item.
Hello! What is the difference between "Description" and "Notes" on the listing page? I'm assuming that Description is where I put the book description that I want on my online listings. Is that correct?
When you see books listed in Biblio, which is where I plan to list, their description includes everything related to the book, including condition. Is that what I should include in the AOB description field?
Description is for the synopsis of what the book is about. Notes describes the condition of the book in-hand.
The Description field is only sent to eBay and then only if you have it added in your Description Template.
Notes is sent to every venue.
Hope this helps!